Install VirtualBox on Ubuntu Based and derivative distribution
VirtualBox is a popular open-source multi-platform virtualization application developed by Oracle. VirtualBox is used for installing and running multiple operating systems at the same time inside of a virtually created machine. Mostly, VirtualBox is used for testing and development purposes.
The installation methods mentioned here should also work for other Debian- and Ubuntu-based Linux distributions such as Linux Mint, elementary OS, etc...
Open a terminal and before to move further, update the system’s package repository by using the following command.
sudo apt update
After updating the system’s APT cache repository, install VirtualBox using the command given below.
sudo apt install virtualbox
Install VirtualBox on Windows or MacOS
If you are running Windows or MacOS operating system, before to go to the next step, you will need to download the VirtualBox installer and proceed with the installation on your machine.
Step 1 - Create a Virtual Machine
Once you’ve it opened, click on the New icon located at the top of VirtualBox windows to create a new virtual machine.

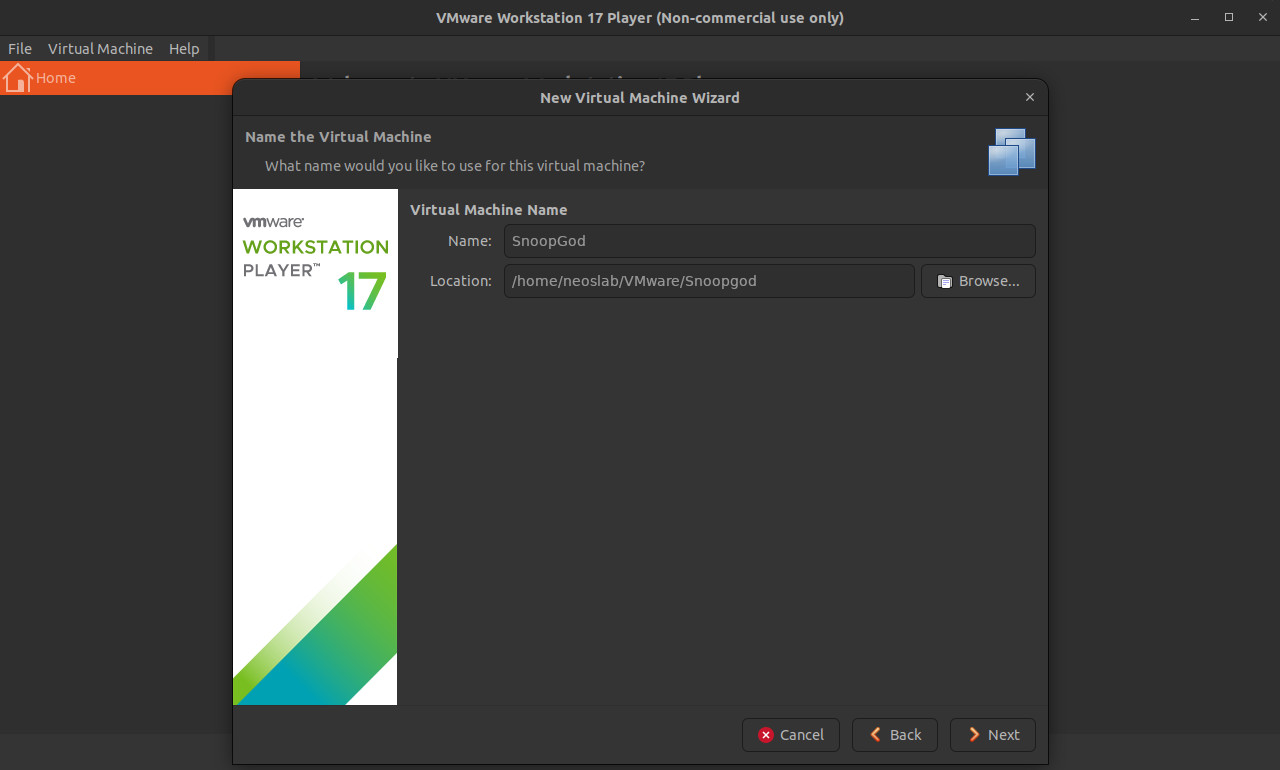
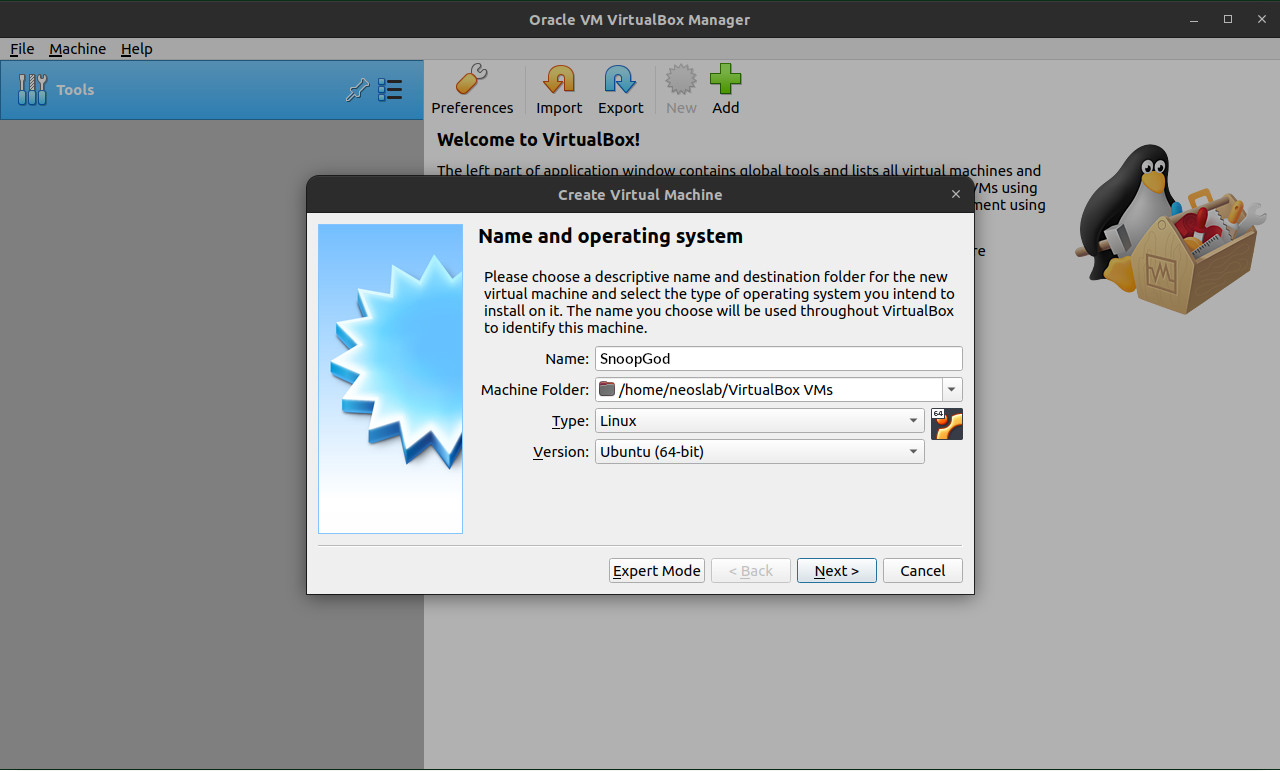
Step 2 - Setup name and operating system
Enter the Name you want to use for your virtual machine. Optionaly, you can also specify the path of the directory where your Virtual Machine will be saved referenced as Machine Folder. Select Linux in the Type dropdown menu and finally set the version of your Virtual Machine to Ubuntu and click " Next" when you are done.
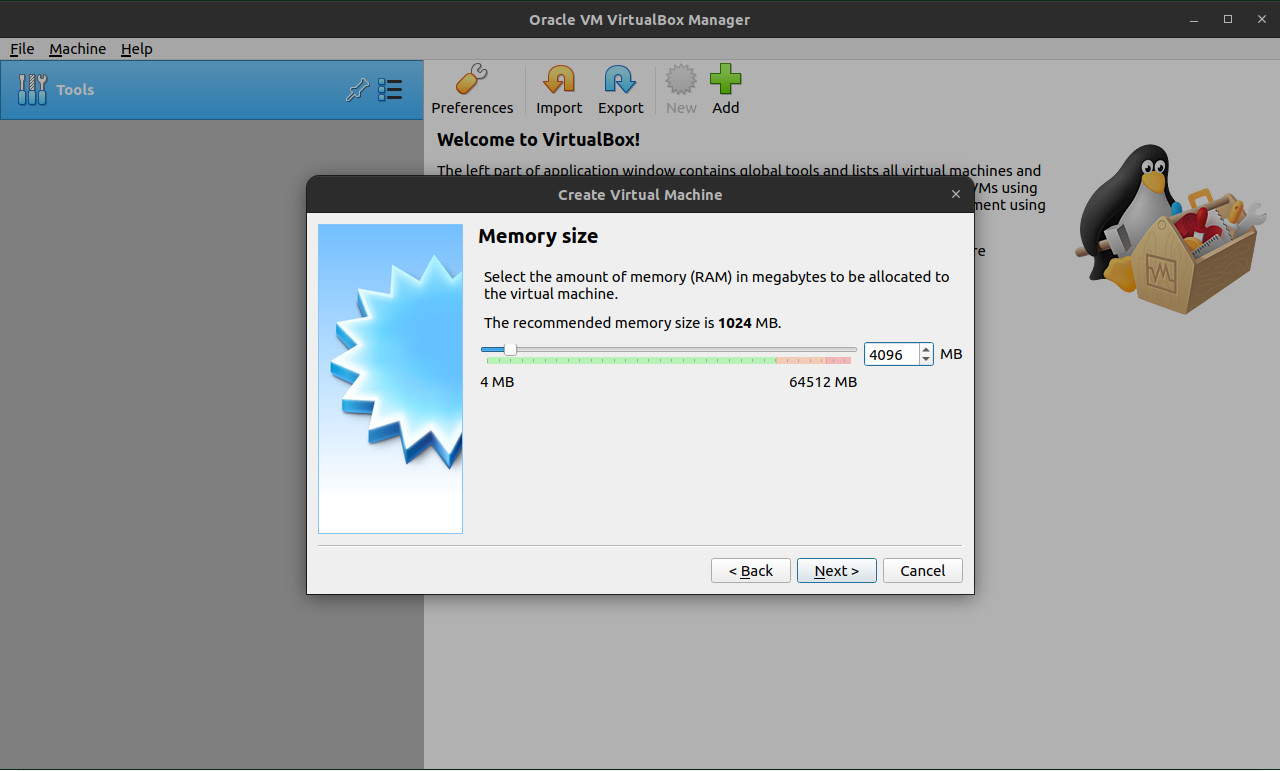
Step 3 - Memory Size
SnoopGod Linux can run on machines with 1024MB of RAM, but at least 2GB is strongly recommended. Choose the settings that match with your device and click " Next" to continue.
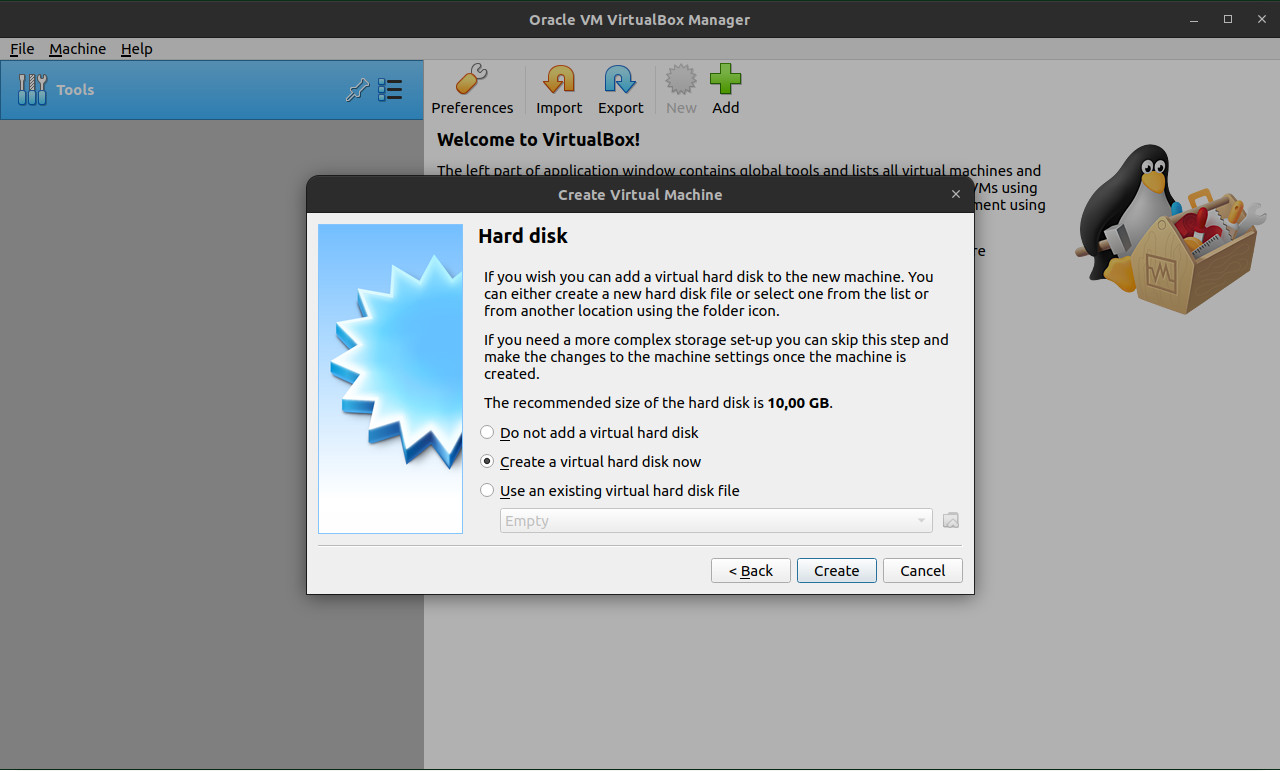
Step 4 - Hard Disk
It's now the time to Create a virtual hard disk by selecting the second option available in the menu and click " Create" to move to the next step.
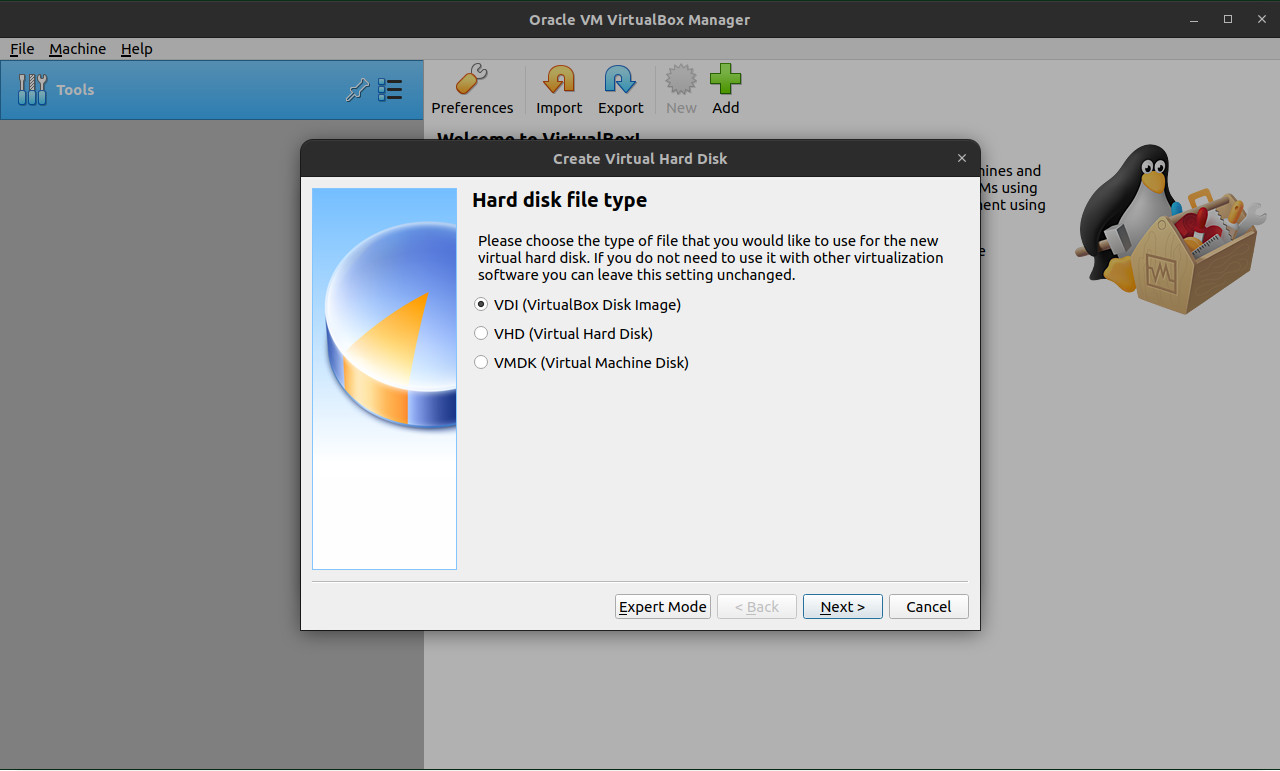
Step 5 - Hard Disk File Type
In the next step, select VDI (VirtualBox Disk Image) as your Hard drive file type and click " Next" to continue.
Step 6 - Storage on Physical Hard Disk
Now, you will have to choose how VirtualBox manage the storage of your virtual machine. If you are not sure, we recommend to select Dynamically allocated and click " Next" to continue.

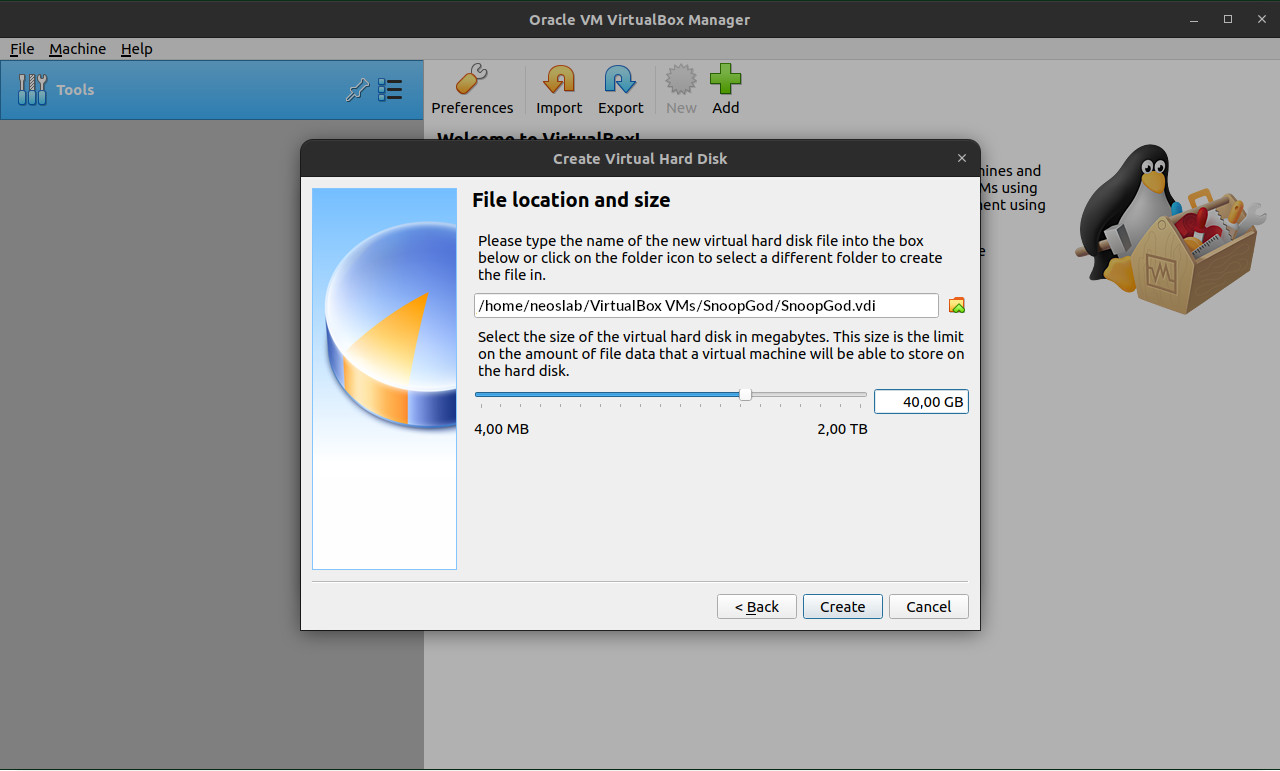
Step 7 - File location and size
In this step, you can modify the Machine Folder location path previously set in Step 1. Furthermore, you can increase the size of your Virtual Hard Disk. We recommend to use a size of at least 40GiB or greater. Click " Next" to continue the settings process when you are ready.
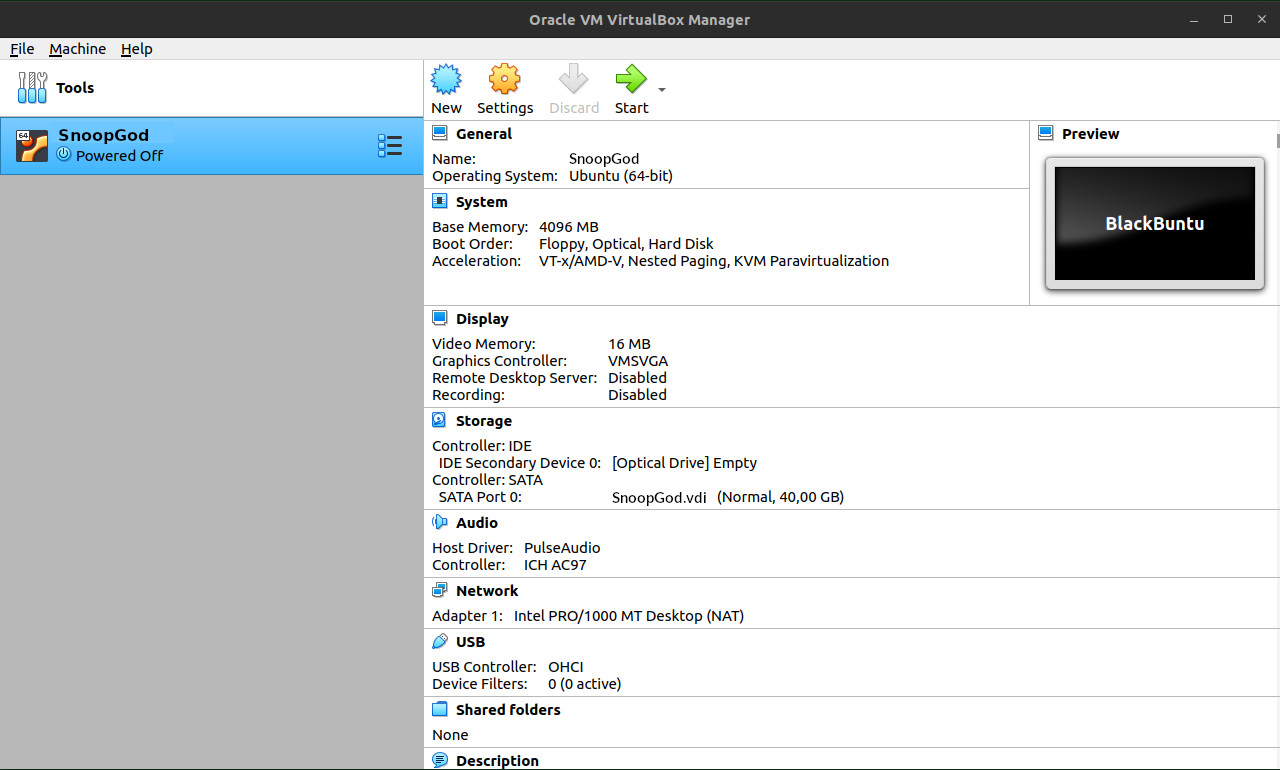
Step 8 - Virtual Machine Optimization
Your virtual machine should now appear in the left side of your screen as per the below screenshot. It's now the time to finalize your configuration making some extra changes. To do so, just " Right-Click" on your virtual machine name and select " Settings" in the dropdown menu.
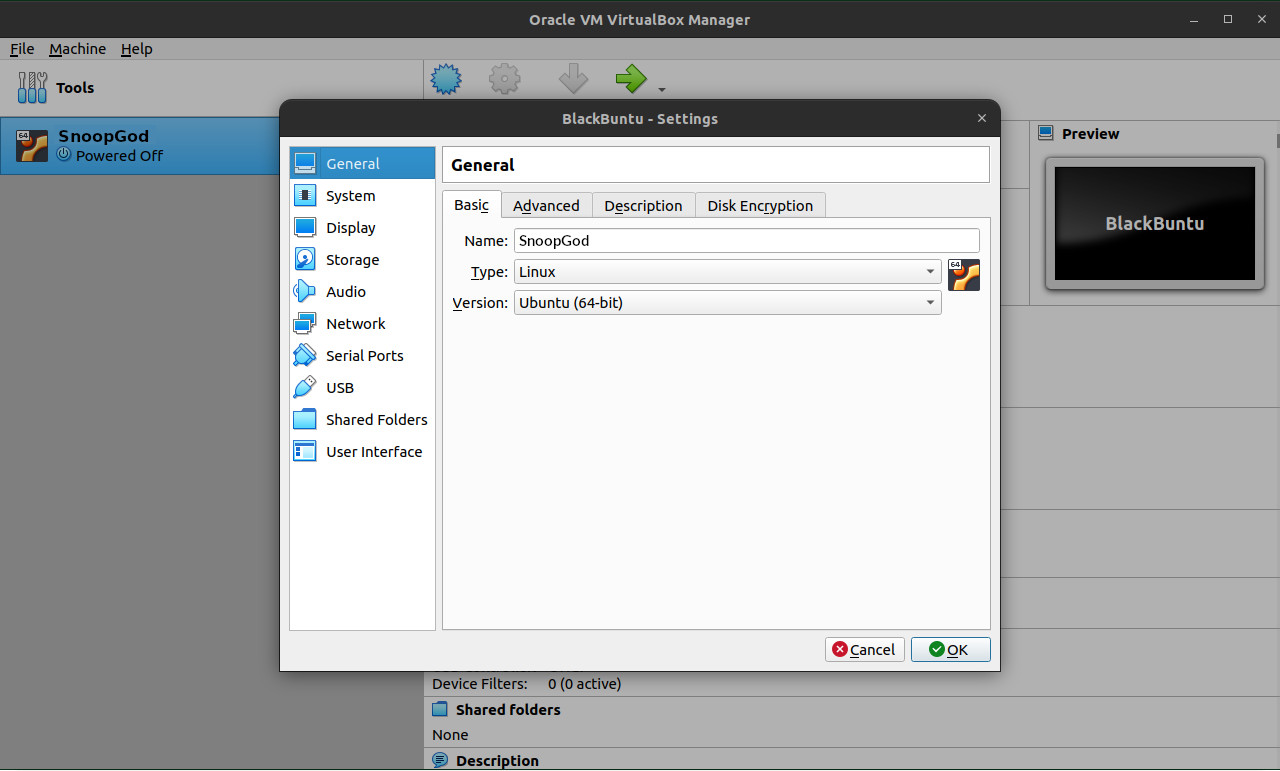
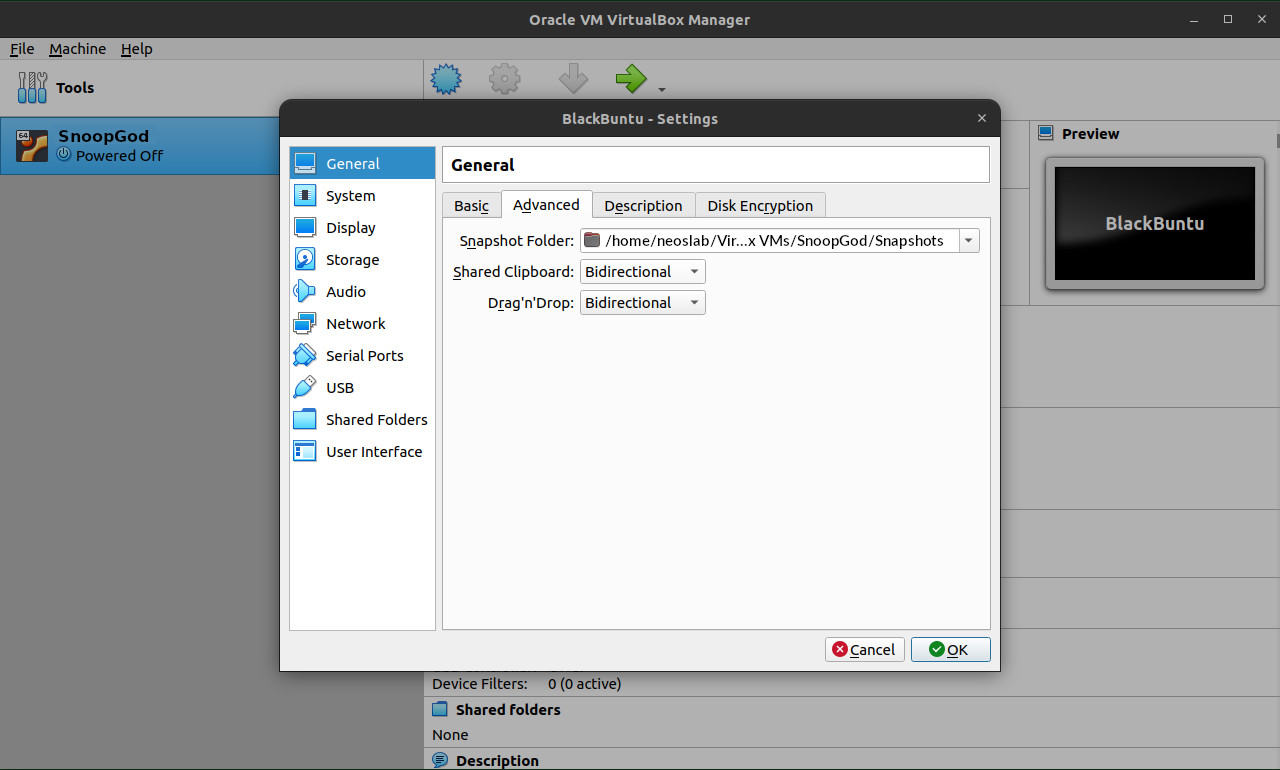
Step 9 - Shared Clipboard and Drag/Drop Feature
If you want to be able to share files between your operating system and your virtual machine in both directions, under the General menu, select the Advanced TAB and change Shared Clipboard and Drag ’n’ Drop to Bidirectional. This will allow you to copy/paste files and clipboard content from your HOST to your virtual machine or vice versa.
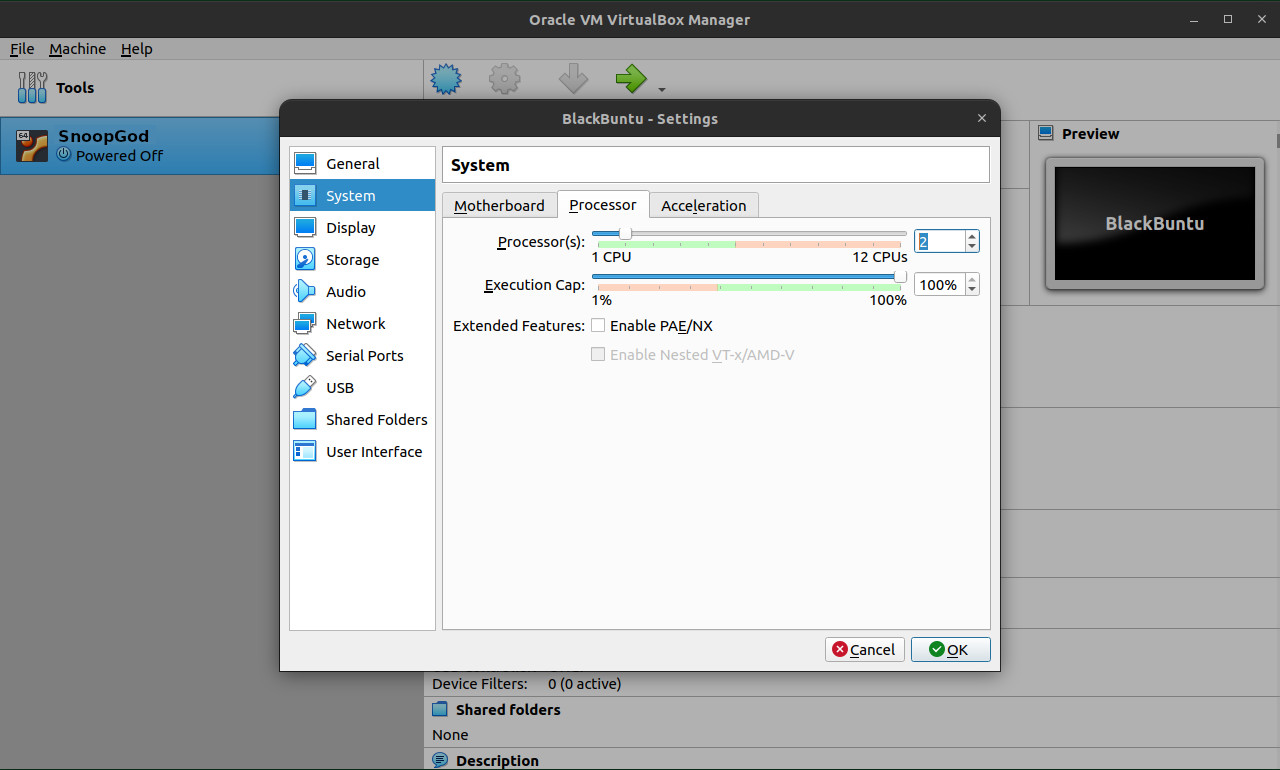
Step 10 - System Processor
To optimize the performance of your virtual machine you should setup the number of processors that can be used from your operating system. To do so, navigate under the System menu, select the Processor TAB and from there you can change the number of processors to be used by your virtual machine. We recommend to setup 2 virtual cores which is works well for almost every operating system.
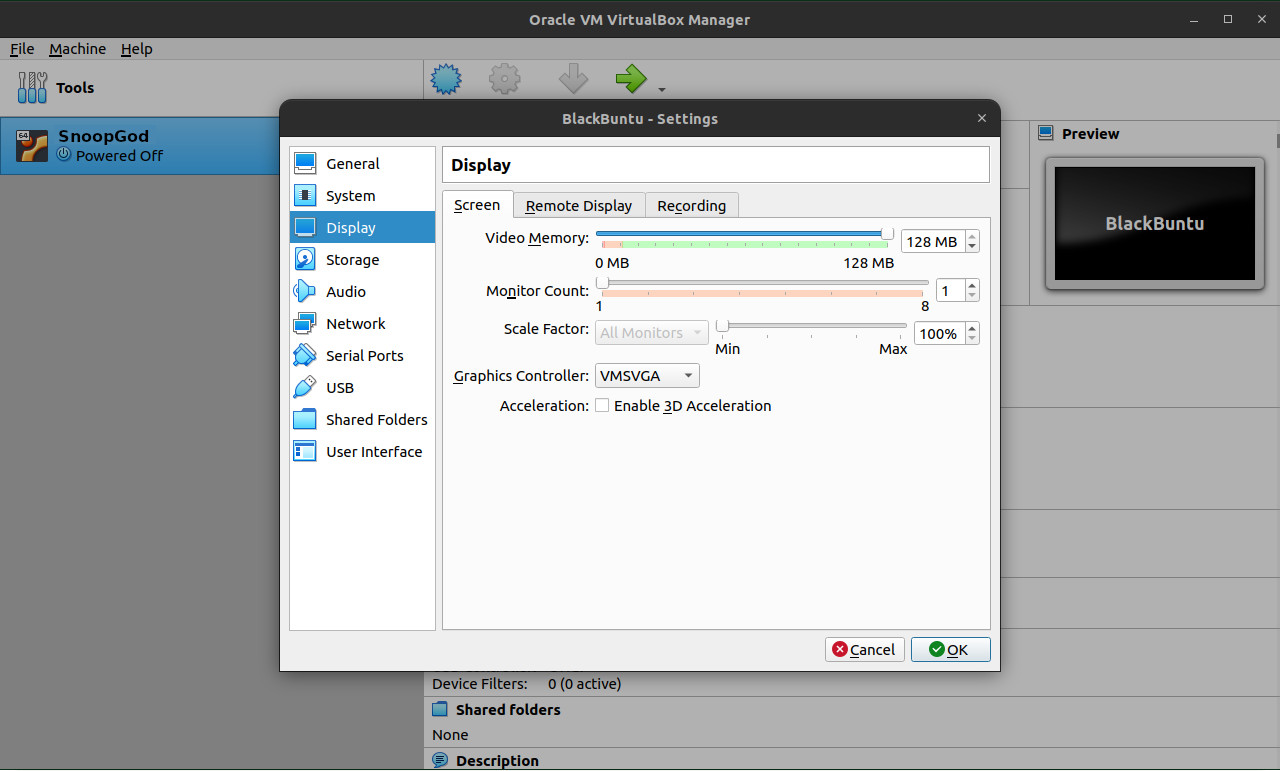
Step 11 - Display Screen
If you want to be enable to increase the screen resolution of your virtual machine, you must first of allocate the video memory you allow your virtual machine to use. To do so, navigate under the Display menu, select the Screen TAB and set the Video Memory to the maximal value allowed by your host system.
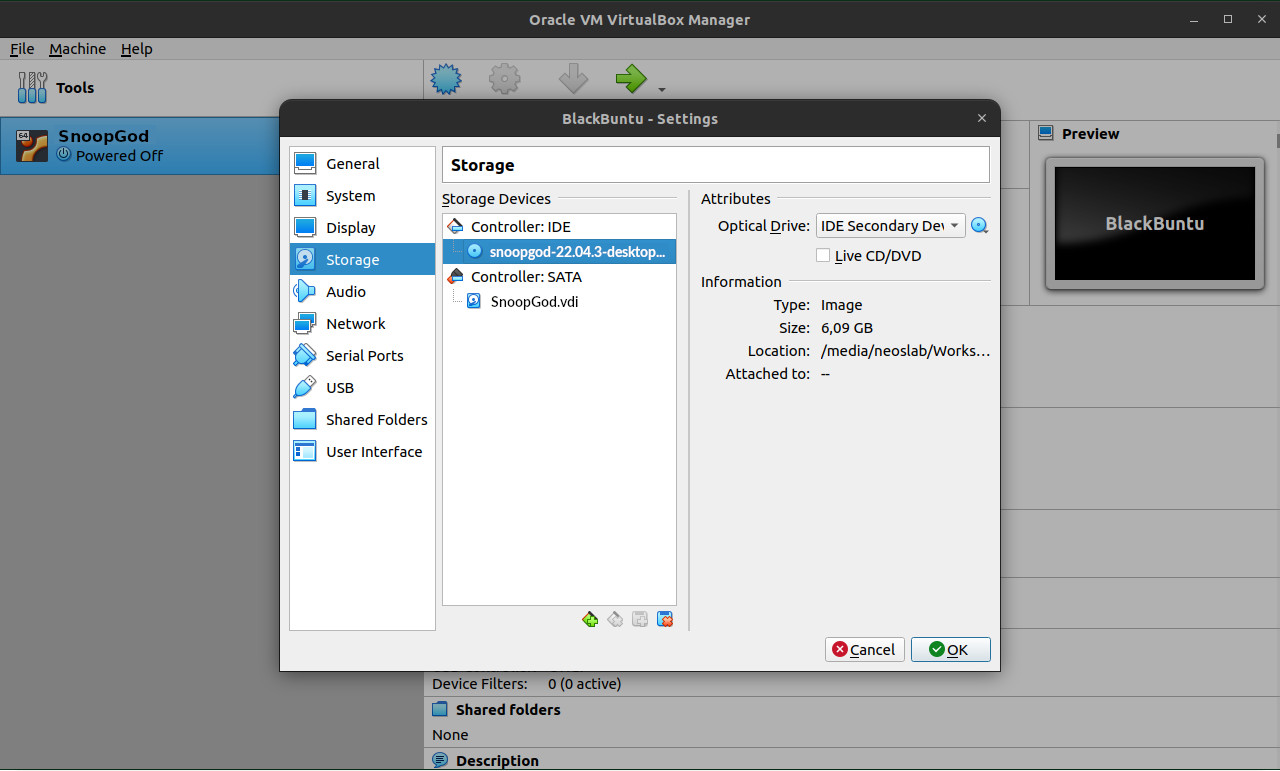
Step 12 - Loading SnoopGod ISO image
This step is crucial. You are now going to select the SnoopGod Linux ISO image you downloaded to insert it into your virtual machine. To do so, navigate under the Storage menu and highlight the empty CD icon under the Controller: IDE field. Now from the right side of the window, click on the CD icon in order to be able to select the SnoopGod ISO image from your computer.
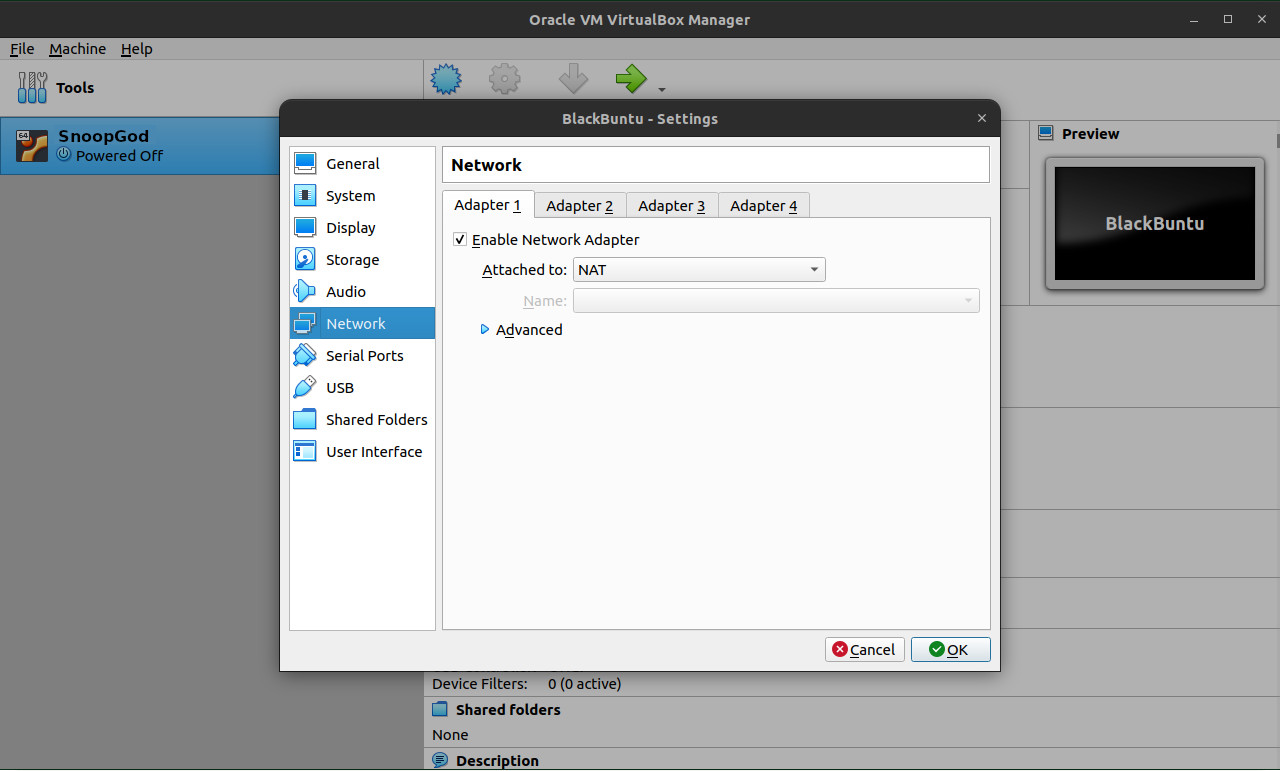
Step 13 - Network
The setting of the network is normally already configured but if you want to modify it, navigate under the Network menu, select the Adapter 1 TAB. From there you can enable or disable the networks adapters as you need.
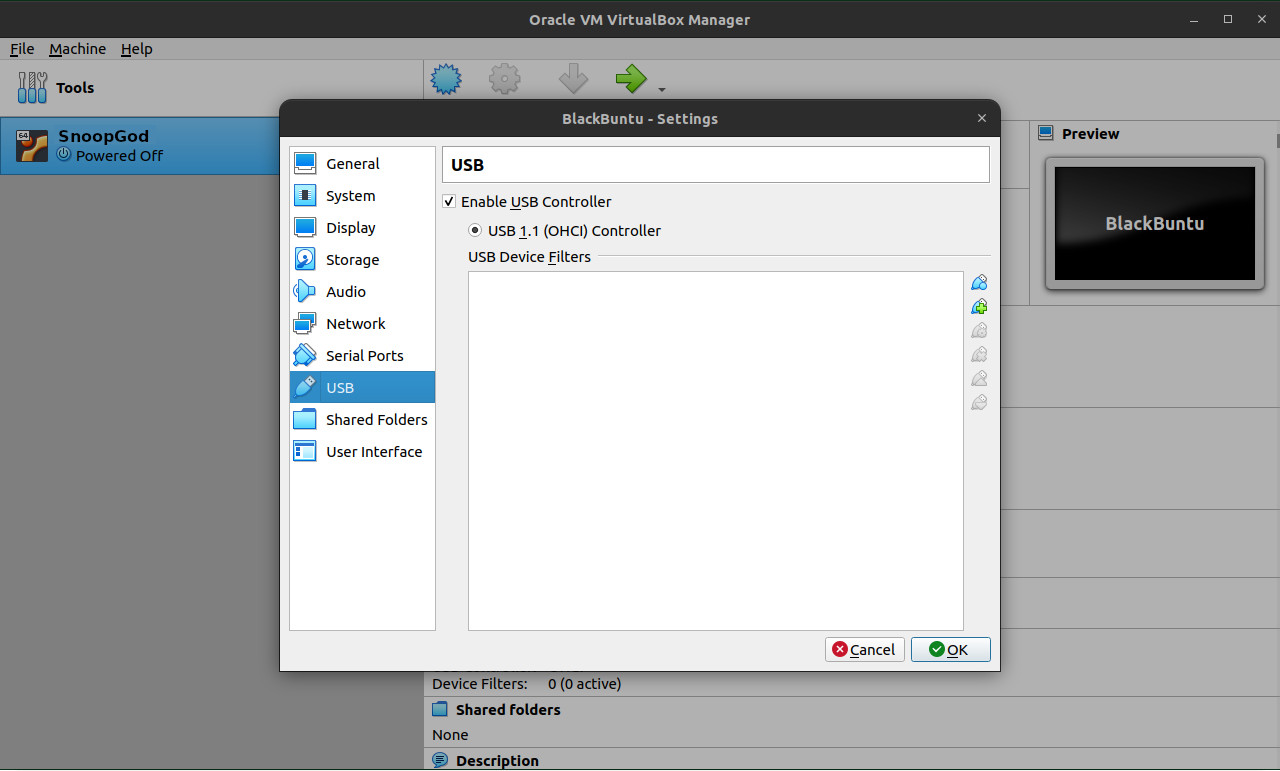
Step 14 - USB 2.0/3.0 Controllers
Before to change the settings of this section ensure you have properly installed the virtualbox-ext-pack. If you are ready, simply navigate under the USB menu, select the Enable USB Controller checkbox and select the option associated to the one you want to enable.